How to setup and pair drone devices?

Written by: Lei Chen

|

|

Time to read 2 min

Open boxes and get all devices out in an open space outdoor


The Drone needs to access GPS satellite to complete the setup process

1. Add Devices into Your XAG One Account

Applicable models

P100PH/P100H/P40EN/V40EN


Direct RCN 4G Network Mode

The drone and remote controller need to be online through 4G network.


Network Mode

1.1. Add Remote Controller to XAG One Account

  1. Insert 4G SIM card into remote controller
Sim card slot
  1. Second light (Cloud IOT) illuminates green
remote controller led
  1. Turn off remote controller
  2. Long press the power button of remote controller until all six LED light indicators flash 
    green
  3. Open XAG One App, go to add device and input/scan remote controller serial number, 
    input device name and confirm
  4. Wait until the remote controller gets online; If not, kill and restart the APP
remote controller QR code
  1. update the firmware.
update firmware

1.2. Add Drone to XAG One Account

  1. Insert 4G SIM card into UAV.
UAV Sim card slot
  1. Power up UAV, wait for 60 seconds until SuperX4 connects 4G. To verify the 4G 
    connection, check the 2nd light indicator (remote server) light indicator is flashing in  green. The UAV should be placed outside, and the taillight should be green flashing.Turn on UAV, wait until both WIFI and Cloud light flash green.. 
UAV led
  1. Open XAG One App, go to add device and input/scan UAV serial number, input device name 
    and confirm.
  2. Wait until the UAV gets online; If not, kill and restart the APP
Scan UAV

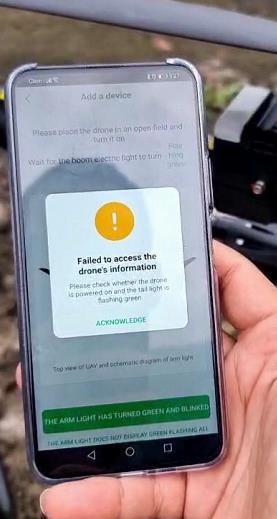
Tips: If the error “Failed to access the drone’s information” is prompted, it’s because your 
drone is either not connecting to 4G or losing GNSS positions. Please check your 4G 
connection and bring your drone to an open field with good CNSS position signal.

Error

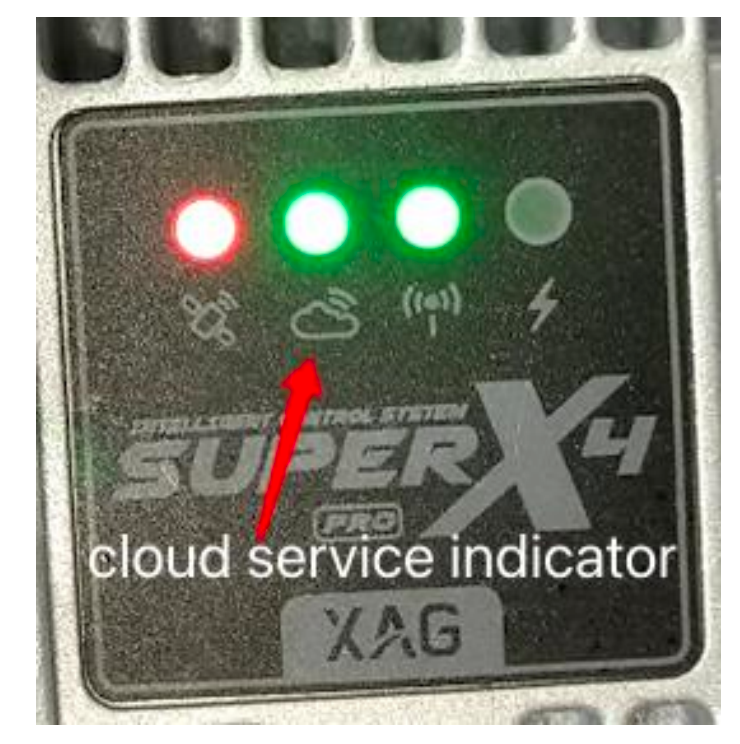
Tips: If the GNSS positioning signal is good, the 1st light indicator will be in green. If the 1st light indicator is in red, the GNSS positioning signal is bad. Usually if it’s the first time adding the drone, the drone needs to report its physical 
location to the remote cloud server for security check. Thus, the drone needs to have GNSS position, which means it need to be brought onto an open field, for getting better satellites broadcast signal.

No GPS Signal led
  1. Go to My→Device→Select Drone→Firware Update, update firmware
Drone Firmware update

2. Bind the Drone with the Remote Controller

  1. Turn on the drone and put the drone into pairing mode.
  2. Long press and hold the drone battery power button.
Battery power button
  1. Release the battery power button when the arm light slowly flashes yellow, and the WiFi light indicator (the third light of flight control) 
    alternates between green and red..
WIFI indicator
  1. Place remote controller (RC) close to UAV, wait for 30 seconds,
  2. Pair success indication: 
    1. ARC3 Pro: no voice prompt, but you will hear a beeping sound. Meanwhile, the RC 
      third light becomes dim. 
    2. Drone: flight control second light indicator (Cloud) flashes in green. It means that the drone is online and connected to the XAG server. 
  3. In case you only hear the voice prompt or the beep sound but the second light indicator (cloud) does not flash in green, wait for 5 minutes until the Cloud services indicator flashes green.
  4. Binding is success.
Service Indicator

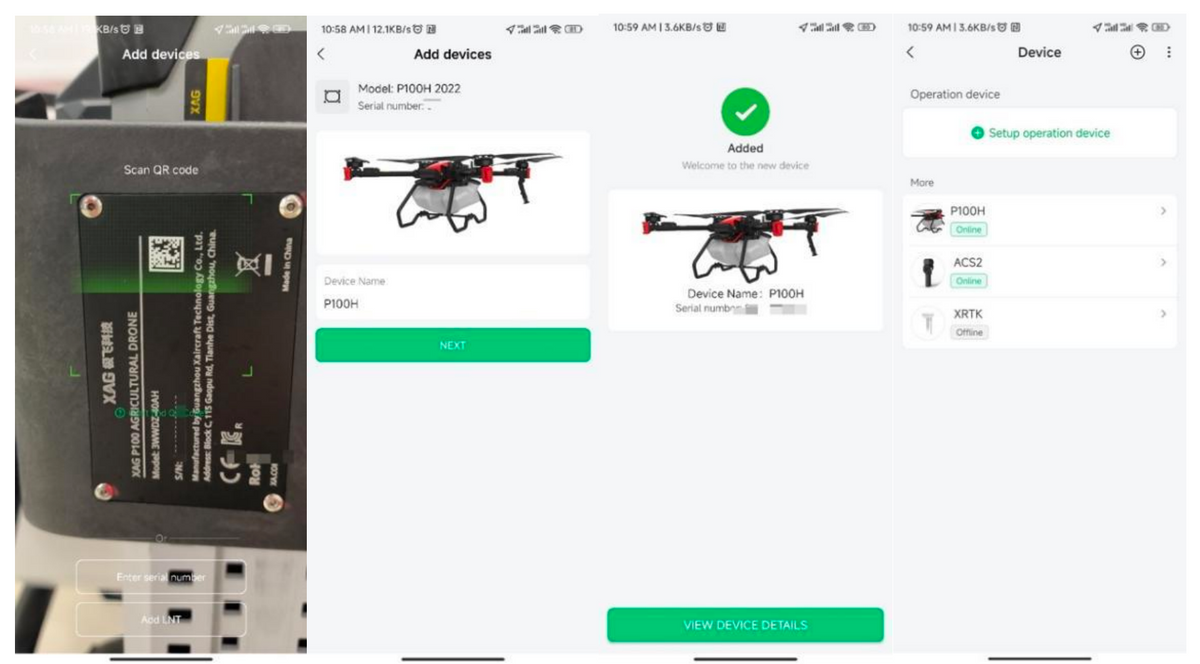
All Devices should be added and bound to your XAG one account.