

XAG P100 Pro - Quick Start Guide

Steps to Set Up and Prepare XAG P100 Pro for a Spray Drone Mission
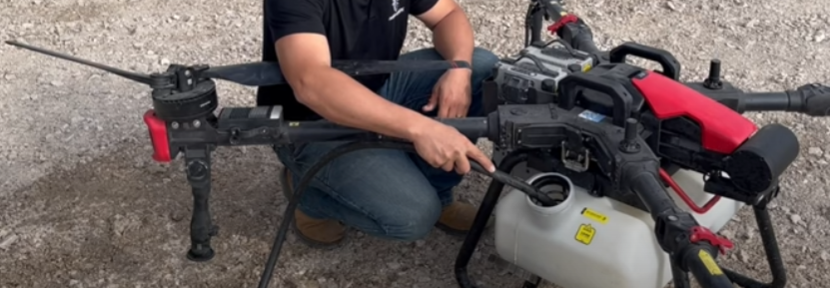
P100 Pro Overview
The XAG P100 Pro is the most efficient and durable drone, reaching speeds more than 30 mph! This 110 lbs payload drone can carry up to 13.5 gallons of liquid. The P100 Pro can cover around 60 acres an hour with a 2 gallon/acer rate and a pump flow up to 6 gal/min. It can be operated in assisted manual flight or fully autonomous. The P100 Pro can even fly in aeras with no service or RTK.
If you wish to learn more about the XAG P100 Pro visit: Tell Me More About The P100 Pro
Mission Overview
Your equipment requirements may differ depending on the situation, but every mission will need the P100 Pro, remote controller, android device batteries, chargers, and possibly a RTK base station. A smaller video/mapping drone may also be beneficial to add your equipment.
There are a few ways you can go about creating your field boundaries. Our most recommended is using a mapping drone prior or the day of to map/scout the field. Other ways include satellite imagery on the XAG One app or using your P100 Pro remote controller location to add boundary points. In this article we will be showing how to map using the XAG One app.
Most GPS positioning can be inaccurate by as much as 5-10 feet, so it's better to have higher accuracy GPS such as RTK. To ensure that you can spray up to the boundaries and get into tight spaces, we suggest using a RTK bases, CORS networks or internal VRTK for mapping and flying.
Step 1: Unpack/Set Up
Aircraft
Take out the P100 Pro and set it in an open area with mostly level ground that's good for takeoff and landing (no wires, trees or buildings nearby). Take off the prop holder and unfold the arms. Make sure all claps are latched and not lose. Then extend the propellers and examine each one as you do so. Lastly drop down the spray nozzles and lock them into place.

Before you can create or execute a mission the P100 Pro must be activated and paired to your devices and account. If this is not already completed check out: How to Set up and Pair the P100 Pro
Batteries
Make sure you charge your batteries before going out. It might seem like something simple but the XAG P100 Pro's batteries smartly discharge after time and you could be surprised how may times you may go out to the field and be ready to fly but you have to wait because the batteries were not charged.
Step 2: Plan
Scouting
Prior to setting up field boundaries you should scout the field and its surroundings. Look for any and all things that could become a problem for your drones mission. Trees, powerlines, fences, windmills, etc. Also make note of where you will set up your home base. Can the P100 Pro get to and from the field safely from where you are stationed?
Setting Up Fields
Before creating your field make sure you are connected to the Arc3Pro (remote controller). To check look at your WiFi settings.
If everything looks good open the XAG One app.

On the XAG One app you will see your location and the P100 Pro's on satellite imagery. Here you can create your field and add any obstacles or no-spray aeras.
Once the app is open, click the plus sign in the upper right corner. Then click “Create a new field”.
Once in field creation tap the screen at the places where you want to add a boundary point. You can close the boundary yourself or use the auto closing feature and it will close for you.
When you are finished with creating the boundary click save.
Obstacle and no spray zones
While still creating your field (after your boundary is created and saved) you can click the bottom left button and change it from field boundary to obstacle or non-spray.
Add the obstacle or non-spray boundaries the same way as field boundaries, by tapping the screen.
Obstacle boundaries: the P100 Pro will stay out of completely.
Non-spray boundaries: the P100 Prp will fly through but will turn the nozzles off while in that area.
If you need to edit a field after you've already pressed save, click on the field and choose manage fields.
Then click edit field and it will bring you back into the editing stage where you can change or add field, obstacle and non-spray boundaries.


Step 3: Prep / Fill
Make sure cap it tightened after filling
Also check that the tank it's properly clamped onto the P100 Pro.
Spray Settings
- Click on the field and then choose start operation. That will then show you the drones flight path and spray settings
- Click spraying settings located in the bottom left to change spray parameters

Route Settings
Click route settings located in the bottom right to adjust route spacing, speed and height.
In the route setting you will see Approaching route, Operation route, and Advanced settings.
Changing the operation route will only affect the height, speed and route spacing while spraying. Changing the approaching route will only effect the height and speed of the drone going to and from the field and home point.
Step 4: Fly
Execute Spray Mission
Once your P100 Pro is filled, placed in an open aera, the mission settings is set to the suitable parameters for your desired application, and the batteries are fully charged and clicked into place in the drone you can now start the mission
To start the mission click on the field you will be flying. Choose start operation then click start operation again and the P100 Pro will automatically take off following your approaching route settings.
At any time you can pause the operation and edit spraying or route settings as desired.

Step 5: Pack
Once you have competed your mission it's time to get the P100 Pro ready to be transported or stored until the next mission. After application its a good idea to flush out the system. First make sure any left over chemical has been properly removed from the tank. Then you can put clean water with soap or a tank cleaner and run it though the system to clean the houses and nozzles.
You'll also want to clean the exterior of the P100 Pro before transpiration or storage. This can be done with a water hose or pressure washer and soap. Be carful not to use a pressure washer directly on electronical components including camera, sensors, and wires.
Now watch the process of setting up and spraying with the P100 Pro.
If you have any questions about the XAG P100 Pro please visit our Contact Us page and reach out!


Leave a comment